Convert Video to MP4 on Mac
Nowadays living in such fast work environment, enjoying music and movies in our spare time is a good choice to relax. And we need a convenient and fast way to get our music and movies we like. We get iPod, iPhone, PSP, Creative Zen, Zune, iRiver PMP, Archos, PS3 and so on enjoy music, movies and games. But we often meet formats problems when we get music and movies from YouTube, Limewire and other online sites.
This guide will show you how to convert video to MP4 on Mac for these popular MP4 Players.
Step 1. Download and install Aiseesoft MP4 Converter for Mac (Intel Version, Power PC Version).
Step 2. Add your video.
Click the “Add file” button to load your video.
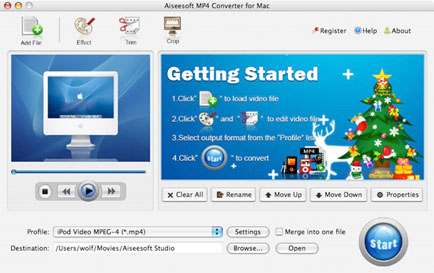
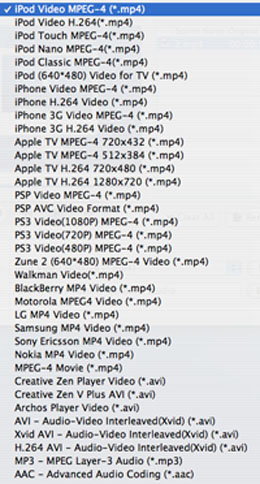
Step 3. Select output format from the profile list and settings.
Selecting output format is really easy; you can choose your output format according to your devices players and the default setting works great.
And also you could set your own settings by clicking “Settings” button to choose your own video resolution, frame rate, bit rate, encoder, and etc.

Furthermore, you could set the special settings by clicking "Trim", "Crop" and "Effect".
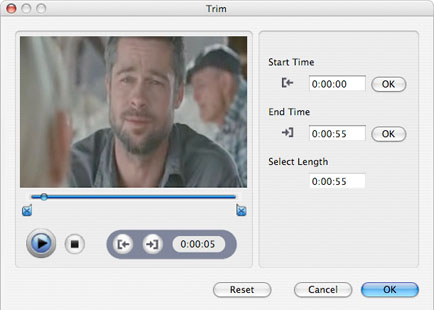
1. Trim
Please click “Trim” button and drag the “Start trim slider” to set the start time and “End trim slider” to set the end time. You can also do that by clicking the “Start trim button” and “End trim button”. The third way you do that is set the exact Start/End time at the right of the pop-up window and click “OK”.
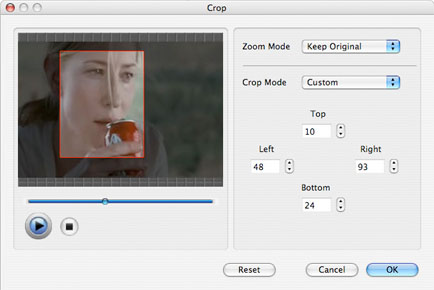
2. Crop
If you want to remove the black edges or you want to rip a certain area of your video, please click the “Crop” button. You can do this either by drag the frame around the movie or set the crop value: “Top, Left, Bottom, Right”. Another way to do that is choose mode from “Crop Mode”.
Aiseesoft MP4 Converter for Mac also allows you to choose the output aspect ratio above the crop pane, “Keep Original, full screen, 16:9 and 4:3”are available.
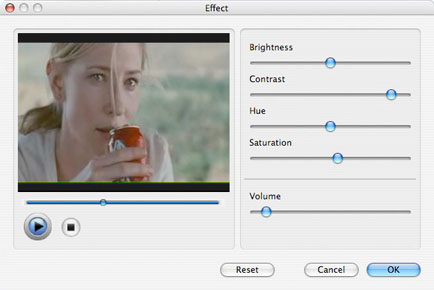
3. Effect
If you want to adjust the effect of your movie, please click the “Effect” button and a pop-up effect window will appear. It allows you to edit your movie’s effect including “Brightness, Contrast, Hue, Saturation and Volume”.
4. Merge into one file/audio track/subtitles
If you would like to put several files into one output file, please tick the check box of the “Merge into one file”.
After setting your own output and settings you can click “Start” button to start your conversion.
- How to Download Videos from YouTube
- How to Transfer Music from iPod to Computer
- How to put Video on iPod
- How to convert .Mod files
- How to convert Videos
- Convert Video for Sansa Fuze
- How to convert YouTube video files to PSP
- Convert Video to MP4 on Mac
- How to download Limewire Video to iPod
- How to watch iPod Video on large screen TV
- Learn More Article and Guide